Monday, September 7, 2009

Making my own plastic parts


I had now added latticework between the arched side windows and some embossed wood molding along the top of them. Notice too the corinthian capital (column top) pictured here... that was a chore believe it or not! I had never before been involved with mold making and creating plastic pieces at home, but now I had an excuse to get very involved in it. After checking out some great videos online and going down to the plastics store and asking questions, I felt confident I could replicate whatever I needed for my model. I practiced making silicone molds of some action figures I had, and then making plastic copies using "room temperature vulcanizing" (heat curing) liquid plastic. They turned out half decent for a first try which was enough to make me confident. For the corinthian capitals I tried to sculpt one out of clay and then make plastic copies, but it didn't turn out as I'd hoped. So I looked long and hard on the internet for a suitable model which to copy from. I found a plaster corinthian column with a capital on top which was the perfect size. I needed to cut off the top and then sand down the back flat and thin so that it would fit on the wall correctly, and then I made a mold and duplicated the capital in plastic... which was perfect. After using some hobby putty to fill in the gaps around the capital pieces they turned out very clean and authentic.


More molding between the windows

I needed to develop the unusual triangular woodwork that was located at the base of the wall between the two arched windows. This was a little different from what I'd done so far because the shape both angles outward and is triangular in form. I needed to hold down some of the pieces against my belt sander to achieve the angle needed so that this piece would come out from the wall at the correct slant. After assembling the pieces and adding some trim over the front it looked superb.

Completed columns!


After assembling some 48 separate pieces for each column... I could breath a sigh of relief and perform the final step of installing them into place. I was really proud of these columns!

Column construction nearing completion

After long hours in my hobby room with light cheery music playing (tunes played onboard Titanic), the columns were just about done. I still needed to install them onto the walls, but the hard part was over at last! I still can't believe how full scale this looks.

Planning the wall column bases


The bases for the columns took a little ingenuity too, and after developing the method for creating them the rest was easy. By now I had gotten well used to working with small wood pieces and had gotten pretty proficient at it. I've added a few photos here to show construction underway on some of the bases.


Scratchbuilt columns

Like just about everything else in this project I quickly realized the columns alongside the room would need to be scratchbuilt because you can't find that exact miniature piece in a hobby store obviously. But the more challenge the more reward on the other end. So I proceeded to make the columns. At first I tried using my router to create the wonderful slits in the columns, however after hours of trying I gave up on that method because it just wouldn't get the perfect clean look I wanted. So I built a border and then filled it with individually cut slits of wood which looked much better. The rest of the column was made by "Stacking" elements on top of each other which looks great. Every different shape or curve is pretty much a different piece of wood all the way up from bottom to top. Rounded edges were made by sanding the wood by hand, and little recessed cut lines were made with a razor saw. The section below the slotted area had detailing way to fine for me to carve by hand so I found some simulated leading stuff which is a thick liquid that hardens, which you can squeeze from a very small nozzle to make tiny details. I did my best at simulating the same design as seen from photographs of the columns' mid sections. The photo here shows me holding one of the finished mid sections with the top part of the column in the background.

No longer bare walls


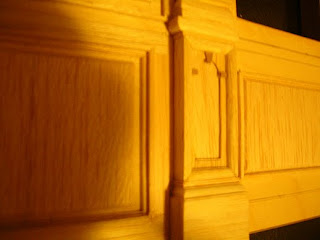
Using a miter box and razor saw, a miniature table saw and a few dozen more tools I embarked on creating the very cool wood detailing on the side walls. Carefully studying photographs I was able to kick off this venture with a very encouraging start! The unique wooden molding pattern on the side walls was a very interesting design feature, which is the first feature I completed. And then I went on the create the wainscotting below. To create the recessed paneling I first laid down a frame of thin wood as a surround, then I mitered and rounded some small pieces to surround the inner edges. Then I created the raised panels which sucked to do! I bought a dremel miniature router and holding it upside down I ran the thin wood panels across the bit to create the routed edges... however many of them didn't end up with a straight edge because the small wood pieces are so sensitive and fragile around machinery like that, and the tool wasn't the most precise for the job either. But it turned out perfect in the end. And I'm proud to say that all of the wainscotting raised panels are now done and stacked up waiting for installation.