Monday, September 7, 2009

My greatest achievement thus far


Along Titanic's outer dining room wall were architectural details made of plaster which were very cool. They resembled columns which narrowed as they fell to the floor, and at the top were busts of a woman's head and shoulders. On top of her head was what looked like a column top. Now how does somebody make that??? Well I figured the lower part that slopes down will be done pretty easily with hobby wood. However the top with the woman's head and everything would be a different story... don't think I can carve that by hand! So of all places I went to Target, checked out some action figures and found the perfect head of a woman to build my model from... which turned out to be a star wars action figure. This little plastic lady went through some pretty greuling torture in my hobby room... I had to cut off her body at her chest and then sand down the back of her head flat. I then used some small wooden dowels and a flat piece of balsa wood to build the "column-top-looking-thing-a-ma-jig" onto her head, and then I carved some lavish hair coming down on to her shoulders and sticking out the top from clay. Finally I made a little paper "T" on her necklace. I then formed a silicone mold from this model and duplicated some finished pieces in plastic. And - WOW! I was so excited about these because I had no idea how I would pull this off when I started this project. But there they were lined up on my work bench, all done. I recently glued these to the rear wall and they are fabulous. By the way they also look EXACTLY like the originals on Titanic, down to the expression on the face.


More molding is applied to the rear wall


Next a strip of molding is applied along the entire length of the rear (outer) wall. At different locations the molding must stick out a little further from the wall to allow for even further paneling which will be installed on the lower half of the wall. Here in the photos is what I have put together so far. The white parts are embossed paper with superfine detail.


Detail begins on the rear wall


The rear wall detail began by inserting the bottom window supports into place. I simply cut some pieces of wood to length and then got an angle by holding them against my belt sander.


The "spades" as I like to call em'


These appliques which are fitted onto the side walls took up a lot of time in my brain. For a long time I was looking for something to create these, and at a craft store I found some little plastic hearts that had a lot of detail on them. So I used one of those hearts by cutting the edges to turn the heart into a spade shape, then filled in any imperfections with clay. I also formed the bases out of clay. Then... again using homemade plastic I duplicated the shape so that I had all the pieces I needed. Then a little sanding on each piece to get them just right. I was thinking about how to make these little things for a long time and it was such a relief to finally see them up on the wall where they belong.


Making my own plastic parts


I had now added latticework between the arched side windows and some embossed wood molding along the top of them. Notice too the corinthian capital (column top) pictured here... that was a chore believe it or not! I had never before been involved with mold making and creating plastic pieces at home, but now I had an excuse to get very involved in it. After checking out some great videos online and going down to the plastics store and asking questions, I felt confident I could replicate whatever I needed for my model. I practiced making silicone molds of some action figures I had, and then making plastic copies using "room temperature vulcanizing" (heat curing) liquid plastic. They turned out half decent for a first try which was enough to make me confident. For the corinthian capitals I tried to sculpt one out of clay and then make plastic copies, but it didn't turn out as I'd hoped. So I looked long and hard on the internet for a suitable model which to copy from. I found a plaster corinthian column with a capital on top which was the perfect size. I needed to cut off the top and then sand down the back flat and thin so that it would fit on the wall correctly, and then I made a mold and duplicated the capital in plastic... which was perfect. After using some hobby putty to fill in the gaps around the capital pieces they turned out very clean and authentic.


More molding between the windows

I needed to develop the unusual triangular woodwork that was located at the base of the wall between the two arched windows. This was a little different from what I'd done so far because the shape both angles outward and is triangular in form. I needed to hold down some of the pieces against my belt sander to achieve the angle needed so that this piece would come out from the wall at the correct slant. After assembling the pieces and adding some trim over the front it looked superb.

Completed columns!


After assembling some 48 separate pieces for each column... I could breath a sigh of relief and perform the final step of installing them into place. I was really proud of these columns!

Column construction nearing completion

After long hours in my hobby room with light cheery music playing (tunes played onboard Titanic), the columns were just about done. I still needed to install them onto the walls, but the hard part was over at last! I still can't believe how full scale this looks.

Planning the wall column bases


The bases for the columns took a little ingenuity too, and after developing the method for creating them the rest was easy. By now I had gotten well used to working with small wood pieces and had gotten pretty proficient at it. I've added a few photos here to show construction underway on some of the bases.


Scratchbuilt columns

Like just about everything else in this project I quickly realized the columns alongside the room would need to be scratchbuilt because you can't find that exact miniature piece in a hobby store obviously. But the more challenge the more reward on the other end. So I proceeded to make the columns. At first I tried using my router to create the wonderful slits in the columns, however after hours of trying I gave up on that method because it just wouldn't get the perfect clean look I wanted. So I built a border and then filled it with individually cut slits of wood which looked much better. The rest of the column was made by "Stacking" elements on top of each other which looks great. Every different shape or curve is pretty much a different piece of wood all the way up from bottom to top. Rounded edges were made by sanding the wood by hand, and little recessed cut lines were made with a razor saw. The section below the slotted area had detailing way to fine for me to carve by hand so I found some simulated leading stuff which is a thick liquid that hardens, which you can squeeze from a very small nozzle to make tiny details. I did my best at simulating the same design as seen from photographs of the columns' mid sections. The photo here shows me holding one of the finished mid sections with the top part of the column in the background.

No longer bare walls


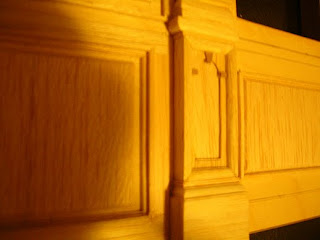
Using a miter box and razor saw, a miniature table saw and a few dozen more tools I embarked on creating the very cool wood detailing on the side walls. Carefully studying photographs I was able to kick off this venture with a very encouraging start! The unique wooden molding pattern on the side walls was a very interesting design feature, which is the first feature I completed. And then I went on the create the wainscotting below. To create the recessed paneling I first laid down a frame of thin wood as a surround, then I mitered and rounded some small pieces to surround the inner edges. Then I created the raised panels which sucked to do! I bought a dremel miniature router and holding it upside down I ran the thin wood panels across the bit to create the routed edges... however many of them didn't end up with a straight edge because the small wood pieces are so sensitive and fragile around machinery like that, and the tool wasn't the most precise for the job either. But it turned out perfect in the end. And I'm proud to say that all of the wainscotting raised panels are now done and stacked up waiting for installation.

Drawing on walls


With pictures as my guide, I drew out plans for the woodwork that would saturate the side walls of the room. After careful measurements and planning I proceeded to draw directly on the walls the patterns of where everything would go. At least I wouldn't just be gluing pieces of wood on the walls without knowing exactly where to put them.

And yet another wall


The rear wall followed the same method of assembly as the others, except having rectangular windows instead of the more difficult arched ones. Again I needed to reinforce the center where the wall halves joined together. After more clamps and more waiting the final interior wall was built. I added the same edges to the window openings as I had done with the arched windows. Phew! The wall construction took a lot of time and patience but it paid off once they were all made. Now they were ready for all the fancy detail, which I was both excited about and nervous at the same time. Would I be able to make all the little custom woodwork and architectural details? Time would tell.

Construction of the front wall


The front wall I made just like the side ones, and it even includes the same arched windows. However the plywood that I bought was not wide enough to cut out one solid wall shape so I needed to create two halves and join them in the middle. So I cut out the front and back side of each half of the wall which totalled four pieces, then assembled them all together with studs in between. To make the wall strong as one assembled piece I made sure to overlap the studs along the center so that the wall had lots of reinforcement where it was joined in the middle. After many clamps were put into place I waited until I was sure all was dry. I then proceeded to add the same window edges as I had done previously on the side walls. At this point I really felt like I was creating a real room, with studs in the walls... electric lighting to be installed in the future... it was all coming together for real! I could set three walls together now along with a dowel posing as a column to get a glimpse of the room taking shape :)


Giving the arched windows a clean finish


After basic construction of the side walls I needed to fill in the inside surface of the window cutouts, which I wasn't sure how to do. However after some brainstorming I went and bought some very thin highly flexible wood strips and glued them along the edge of the windows which turned out perfectly! I was very pleased with the result.

The side walls take shape


I had to figure out how to make the walls, and I decided to build them just like full scale ones. After one of many trips to Michael's craft store I acquired some small 1/4" studs and some craft plywood to build the walls. First I started with the side walls, cutting out the basic shapes. Then I was a little stuck on how to cut out the arched windows... so I bought a drill press with a hole cutter and after marking out where the windows go I cut a hole at the top of the windows, then finished off the rest of the windows with a jigsaw. I did try a scroll saw but I didn't have the same control over the cuts as with a handheld jigsaw. After some sanding the window cutouts looked quite good, and so I commenced with gluing studs along one side of the wall and then gluing the other side of the wall on top of that... using clamps to hold it together for a day or so till the glue dried. The side walls looked great, but I still had to create a solid curved edge within the window cutouts...

Laying the foundation


After a trip to Home Depot I had the materials necessary for construction of my platform. With some help from my Dad (and his tools) I put together a simple rectangular base that would allow for perfect dimension of the room. The putty and sanding phase took awhile but it turned out beautifully. I intentionally made the platform raised with a "crawlspace" beneath in order to house the electronic components for the lighting later. It was so exciting to see a physical start to this project at last.


Planning ensues!


Now that I had the floor pattern designed, I needed to start thinking about the big picture. First off I ordered the deck plans of the titanic on the web, and scanned/printed out the dining saloon floorplan. Seeing as how I'm not that good at math, it took me some time to come up with the correct dimensions for the alcove I was making. I took the overall dimensions of the room which I acquired from books, and figured out the area for my miniature. I've got a workbook full of diagrams, multi-colored lines and numbers from when I was trying to figure it all out... how thick to make the walls, how wide a space between windows (not easy just from pictures). But once I had the dimensions it was time to get to work on the physical project.

A challenging floor pattern

The pattern of the inlaid linoleum flooring is amazingly cool, but the problem was I couldn't just look it up on the internet somewhere. Like everything else in this project I had to make it from scratch using only photographs of the room. All photographs I use for reference are of the Titanic's sister ship Olympic, which was almost a carbon copy of Titanic.

A debate among Titanic buffs has sometimes been that Titanic had carpet in the dining saloon unlike Olympic which had linoleum. Fragments of linoleum tiling identical to Olympics' was recovered from the Titanic wreck site however some think that possibly carpet was laid down over the tiles. At any rate, I decided to go with the linoleum pattern. I'm posting a link here to show Titanic's very own dining saloon tiles.

http://titanic.marconigraph.com/journey137.jpg


I started with some photographs and graph paper. After drawing out the basic design shapes I scanned the drawing and cleaned it up in photo shop. I then added some color and tweaked it a bit, and wow - it turned out! I know it sounds kinda easy but it was officially not. I printed it on card stock with a slight texture and it is a spitting image of the original floor... in miniature of course. I was so excited about how well the pattern turned out that I decided to go ahead with the whole project. I knew it would take considerable time, effort and ingenuity, but hey - if the floor turned out this great I knew I could tackle the rest. So far it has been a joyful hobby with lots of "how the heck am I going to do that" moments, but I think its turning out even better than planned.


An introduction...


Years ago before James Cameron's epic, I found myself in love with the Titanic. I was caught up in the story of her demise and the events that transpired the night she sank. As time has gone by I have been even more intrigued by Titanic's incomparable beauty! What an amazing abundance of luxury... everywhere you looked there were carved wooden moldings, gilded light fixtures and richly colored fabrics. I often find myself deep inside books pertaining to Titanic's construction and it's interior spaces. For some reason the 1st class dining saloon (dining room) on D deck fascinates me. It was vibrant white with wonderful architectural detail, and was the largest room afloat in the entire world. I also love to cook, which probably has something to do with all of this.


Now for some info on my miniature project :) I have spent several years now working on a 1:12 scale miniature of Titanic's 1st class dining saloon. Seeing as how the room was so grand in scale I'd need a miniature over 9 feet long if I made the whole thing at that scale! So I decided to make one of the side alcoves only, which allows me to still construct the miniature in 1:12 and give this thing the detail it deserves.